Dehydrate Your Own Survival Food
Why would you want to know how to dehydrate your own survival food? Both preppers and non-preppers are always looking for ways to stretch their food budget. I enjoy snacking on beef jerky and dried banana chips from time to time, however these tend to be somewhat expensive if purchased from the store already prepared.
Both of these are very good survival foods for a reason. They are dehydrated and are ready to eat as they are. By learning to Dehydrate Your Own Survival Food you can increase your stockpiles, save money and add variety to your stash.
Dehydrating food also makes a great hobby and these foods can be used for a variety of tasks such as camping, hunting or just snacks around the house.
The last and possibly one of the greatest advantages of dehydrating your own survival foods is that you get to pick what ingredients are used. With that being said, read on to learn how to dehydrate your own survival food.
How Do You Begin Dehydrating Food
Dehydrating food has been used for ages. The prehistoric peoples used it for sun drying seeds. Other nomadic people from various continents would sun dry strips of meat. The chinese even dried eggs, while the Japanese dried fish and rice. As you can see this technique has been used by many races throughout history.
Over the ages the techniques to dehydrate or dry food have changed somewhat. In 1795 hot air dehydration was developed in France. Since then this has evolved into the most common way. Dehydrating food is not hard and with modern equipment it is actually quite easy.
Your first steps will include selecting a food to dehydrate, what technique you are going to use and if you plan on using any spices. The final consideration will be how you plan to store the finished product.


Three Techniques You Can Use to Dehydrate Your Own Survival Food
Dehydrators work by heating food slightly to cause evaporation of the moisture in it. The three main techniques used to dehydrate food today are solar or air drying, an electric dehydrator or using your oven.
Solar Dehydrator
A solar dehydrator usually consists of a screen that you hang outside in the sun. It works best in hot temperatures. I usually use this method for drying foods such as fruits and vegetables, especially peppers and other seasonings.
I generally avoid this technique for meat as I worry about contamination, however many people have had great results in this area. If you are interested you can check out this book, The Solar Food Dryer, which contains step by step instructions on how to build your own solar dehydrator from readily available materials. (Amazon link included for your convenience.)
Electric Dehydrator
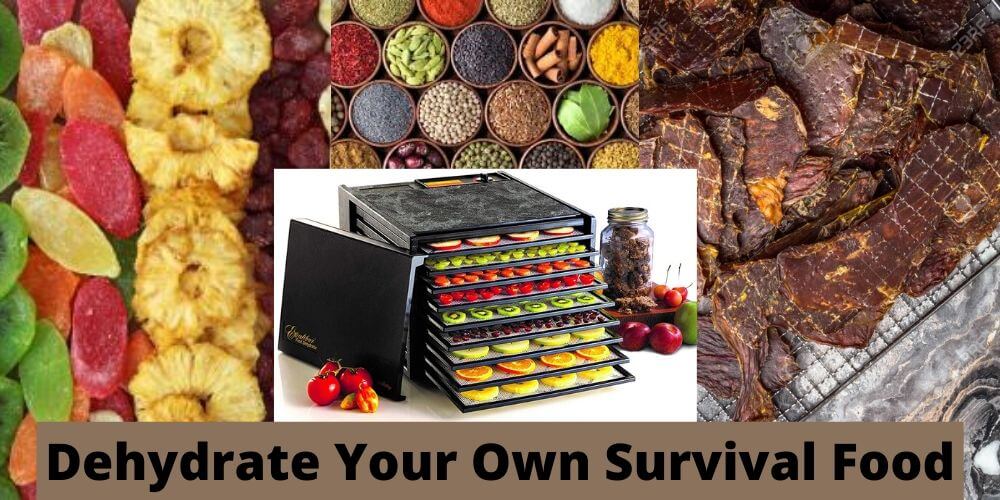
The next option and probably the most common for those serious about dehydrating their food is an electric dehydrator. If you are considering dehydrating your own supply of survival food and not just a few snacks, it would probably be best to purchase a larger size dehydrator. While smaller ones are, of course, much cheaper in price, a large dehydrator will allow you to get your survival food supply prepared quickly, so it will be there when you need it.
The heat in an electric dehydrator is supplied either through an element on the bottom of the dehydrator or by means of a fan at the back of the unit. An electric dehydrator allows you to have complete control over the entire process. You will have the ability to adjust the temperatures and air flow to increase or decrease the rate at which the food dries.
This 1 by Weston is a great entry level design for under $50
Depending on the design these can often hold large amounts of meat, veggies or fruits. I generally prefer to use an electric dehydrator for meats and fruit chips.
Some ideal starting temperatures are:
Herbs – 105 degrees Fahrenheit
Living foods – 105 degrees Fahrenheit
Raising Bread – 110 degrees Fahrenheit
Vegetables – 125 degrees Fahrenheit
Fruits and Fruit Rolls – 135 degrees Fahrenheit
Fish – 155 degrees Fahrenheit
Jerky – 145 degrees Celsius

Using an Oven as a Makeshift
The last technique is akin to the electric dehydrator in that you use a heat source. In this instance you will place the food you wish to dehydrate on a large pan and place it in the oven with the door open slightly and the temperature set on the lowest setting.
You are aiming for a temperature of between 120 and 190 degrees Fahrenheit for this process. The lower the temperature the better. Using this method will general take around 6 to 8 hours.
What Foods Can You Dehydrate and are They Good Survival Foods?
The first thing that comes to my mind when I think about dehydrated food is beef jerky. Though I should probably point out that “beef” jerky is only one of the many types of jerky that you can produce in this way.
I have seen fish, elk, deer, turkey and chicken in addition to the more common beef jerky. You can also change the flavorings and get a wide range of different tastes in this manner.
The options do not end there though. Many dehydrators are used for preparing fruits and vegetables for long term storage. Keep in mind that the more options you can store the more likely you are to one enjoy your diet in a survival situation and two, have things you can trade if needed.
Drying spices such as peppers, thyme, basil, oregano and other garden spices would give you plenty of things you could trade.
Most dehydrators will come with both instructions and recipes to get your started. However, you may want to look around online for other recipes that are more to your taste or perhaps pick up a book written specifically for dehydrated foods.
It is possible to make a complete meal in this manner and you could use them similar to a MRE for both survival and camping if you chose to do so.
Take a look at this video to get a small hint at what is possible.
Dehydrated foods make great survival, camping and bug-out foods due to their long life and very light weight. They tend to be very simple to prepare as all you need to do is add water and heat. Due to the removal of the water in them they are also very space efficient.
Storing the Dehydrated Survival Food
Once your food has been dehydrated, it will need to be stored. This can be done in several ways. My two preferred methods though are either in a mason jar or vacuum sealed with a food saver.
I normally store meat and full meals in the food saver. I will store fruits, vegetables and seasonings in mason jars of an appropriate size. Once the survival food has been packaged, it should be stored in a cool, dark place or the freezer in the case of full meals you are not going to be using in the next few weeks.
Remember to label your packaging with the item type, if it has special spices and the date it was packaged along with any special instructions on preparing it.
Pro – Tip If you weigh your food before dehydration and then again after dehydration you can determine how much water by weight was removed. This is very useful when determining how much water you should add back if you plan on reconstituting a meal such as a stew.
How Long with Dehydrated Food Last?
While your times may vary somewhat, generally speaking, vegetables that have been dehydrated at home will remain good for more than a year. Some claims indicate that certain dried foods can last five to ten years. However, I prefer to cycle my items each year as soon as I can get new crops in.
Meat and fruit will retain freshness only for about six months unless stored in a freezer. I generally try and use any full meals that I have made within two years. I have used them the following two camping seasons with no ill effects.
Keep in mind that any bag that shows mold or other suspicious coloration should be discarded, as these likely had an air leak.
Pro – Tip Your items will last much longer if the air in the container is removed. Using a canning attachment is a great way to do this when storing items in mason jars. I also prefer to store items in serving sized packages when appropriate to avoid exposing unused portions to air. Oxygen Absorbers are a final trick to prolong the life of your product.
Now Apply It
Now that you have learned some of the basics go ahead and try your hand at making and dehydrate your own survival food. Jerky is always popular around my house and my kids absolutely love banana chips. In the meantime here are two more videos to get your thoughts flowing.


Wow, it’s amazing that dehydrated meat can be stored for up to six months. I’m considering to buy a solar food storage dehydrator because I recently got interested in preparing old recipes from centuries ago. As such, most of them involve quite interesting food preservation methods.