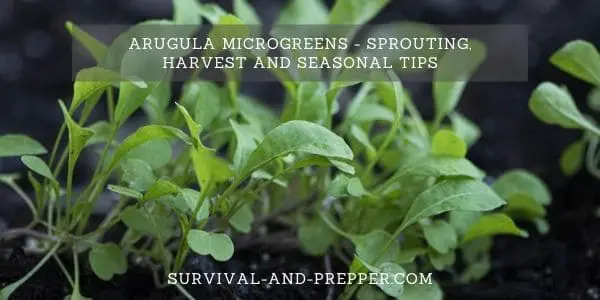
Arugula Microgreens – Sprouting, Harvest and Seasonal Tips
Growing Arugula as Microgreens
Arugula is an excellent option when selecting plants to grow as microgreens. You can eat them from nearly anytime after they sprout all the way through their adult growing cycles. Even the flowers are edible.
As microgreen though they germinate and sprout relatively quickly, often being ready to eat in as little as 5 days after being planted.
With that in mind, let’s dive into how you should plant and grow them for this purpose.
When is the Best Time to Plant Arugula
Arugula grows well in cool weather, especially the spring and fall seasons. However, when being grown as a microgreen you can grow arugula at any time of the year by following a few simple tips.
Since arugula prefers the cooler temperatures of spring and fall you should mimic those temperatures during the other seasons. This can be done in the heat of the summer by keeping them inside a cool garage or shed and using grow lights.
In the winter you can grow arugula inside again using grow lights or you can plant it outside and cover the planting areas with plastic such as a greenhouse or even just simply covering them with clear plastic totes.
This plastic material will allow the light to travel through to the plants while trapping the heat from the sun inside creating the greenhouse warming effect.
Arugula Sprouting Instructions
In order to plant Arugula you will need the following items.
- Growing trays – either cookie sheets, plastic lids or actual growing trays.
- Seeds – I suggest in bulk since Microgreens are small
- Growing medium – Potting soil, coconut coir or even foam with hydroponic solution
- Paper Towels – if using potting soil
When planting Arugula seeds they are relatively thin walled and soaking them to soften the seed shell is not necessary.
Since the seeds don’t need to be prepared in any special manner you can move directly into the preparation of your growing medium. If being grown as microgreens you can use nearly any medium you prefer.
This is largely due to the fact that you will be harvesting them before they have the need for additional nutrients.
I prefer to use a thin tray such as a cookie sheet or even a plastic tub lid as my growing tray.
You can use other growing trays if you choose. This 10 pack of 20×10 trays from Amazon is great as you can plant in 5 trays and use the other 5 as covers during the germination time.
Lay a layer of wet paper towels along the bottom of the sheet or lid and then cover the entirety with about ¼ inch of soil.
(Note – You may have heard of microgreens and sprouts being dangerous to eat due to bacteria, while microgreens are a bit safer than sprouts due to the fact that you do not eat the roots, you can take an added step here and add a small amount of food grade hydrogen peroxide to the water you soak your paper towels in, this will help kill any bacteria that may be present at the start of your growth cycle.)
After this sprinkle your seeds across the surface of the soil at a rate of about 1 to 2 teaspoons for every 20 or so square inches.
(You can calculate this by multiplying the width times the length of your container using inch measurements.)
While I prefer paper towels and potting soil, if you choose to use Coco Coir as a medium then it will likely retain enough moisture in the fibrous material that you will not need to water beyond the initial preparation watering if harvested within 8 days.
Once your seeds are down cover the container with either another pan or lid to keep the light out and moisture trapped in.
Place your prepared plants in a warm area and check them daily. In most cases by day 2 or 3 at the latest the seeds will have sprouted and be showing their first leaves.
At this point remove their cover and provide ample light, either from sunlight or a grow lamp.
Within 5 to 8 days your seedlings should have opened their leaves and be around 1 to three inches tall.
They are ready for harvest at this point, or they can be left to grow larger.
TIP – Plant the seeds thickly as you will harvest them before they begin to compete for space and denser seeds will yield more microgreens.
What to Expect as Your Arugula Grows into Microgreens
For the first two days you won’t see much change.
Towards the end of the second day and into the third day most of your seeds will have begun to sprout sending out their first roots and possibly the tips of the stem.
Into day 4 and 5 the seedlings will be ready to be exposed to light and you can remove their covers.
Over the next three to four days your seedlings will rapidly develop into microgreens growing about 1 to 3 inches tall and developing their first few leaves.
During this monitor the moisture levels as long as the soil feels damp they are ok. If left outside it will be necessary to water them more frequently but if inside you shouldn’t need to water them more than once or twice during their growth cycle.
Somewhere around day 8 to 12 your arugula microgreens will be ready for harvest. You can expect a stalk of about three inches tall with two bright green leaves at this point.
As they grow, monitor the soil around the base of the plants, in some cases mold is an issue and you want to monitor for this.
However, remember that as they grow your microgreens will send out hundreds of tiny little white roots along their main root that may resemble mold. This is not a concern.
As you monitor the soil, look for areas that develop differently than the remaining plants, if you see area that are growing blobs instead of a steady outward creep of roots then this is the time to consider abandoning that crop, though if you don’t over water and you used a quality seed you should not have any issues.
How to Harvest Arugula Microgreens
As mentioned before, with microgreens you do not eat the root system as you would when harvesting sprouts.
With that in mind when harvesting arugula as microgreens you are going to take a pair of garden scissors or shears and clip the stems off just above the soil level.
Since you are harvesting basically the entire plant, once you have clipped all of the greens you can discard the remaining root system.
While some do indicate that arugula will often regrow new leaves after being cut if the stalk and root system is left, I have not tried this step. According to an article on Gardenine it is possible for arugula to regrow a new set of leaves at least one time after being cut.
With that being said due to concerns about mold that often come with sprouts and microgreens I would just add the used soil to a compost pile or outdoor garden and start with fresh soil if you choose to start a new batch.
When harvesting your microgreens harvest what you plan to eat at a time and as close to meal time as possible. Due to their high moisture content nearly all microgreens, arugula included, will begin to wilt if exposed to heat.
Should you decide to harvest your entire crop and not eat them at that time, they should be stored in a refrigerator at around 40 degrees and consumed within 3 to 5 days.
Discard any greens that become slimy prior to eating them.
Characteristics and flavor of Arugula as it Grows
As a mature plant arugula often has somewhat of a spicy flavoring and some people might call it bitter, while others really enjoy the taste it adds when mixed with other greens.
However, by harvesting arugula as a microgreen or even as baby arugula, “when the leaves are between 1 and 3 inches in length” most of this spiciness is avoided.
As arugula continues to grow it will become spicier. Though it is important to consider harvesting your arugula prior to the leaves getting much larger than 6 inches or so as they will start to thicken and become tough at that size.
Additionally larger plants will “bolt” or begin growing flowers, while these are edible as well if you are using them as greens this is normally considered undesirable as it reduces the availability of the green leafy portions of the plants.
With that being said you can read more on mature Arugula here, or continue on with our discussion of Arugula and Microgreen harvesting.
Are there other Microgreens with a Similar Growth Pattern
Many varieties of plants can be eaten as microgreens. When planting a microgreen garden you will likely want to decide what you plan to use the greens for prior to planting.
By doing so it will help to ensure you have a use for your microgreens. For example Cress is a popular microgreen, however, it is mainly used to provide flavoring to soups and indian cuisines rarely is it consumed in a salad.
Arugula on the other hand is frequently used to add a pop of flavor to salads, and with that in mind you can select several other common salad vegetables to plant along with it.
Lettuce, Kale, Broccoli, Cabbage, Turnip Greens and Celery all have a very similar growth pattern to Arugula and can even be planted in the same trays as arugula. By combining several of these options you could create a ready to eat microgreen salad.
You would have the added benefit of having these seeds on hand if you chose to grow more mature plants for larger harvest. You could even go with a mixture of mature plants and microgreens.
Doing so would ensure you had green leafy options all year round.
In Conclusion
Growing Arugula Microgreens is not a difficult task, once scattered on an appropriate soil, they almost take care of themselves.
With a very minimal investment of time you can have a crop of microgreens up and running in no time. These can be consumed at your own table or even sold in local farmers markets and to upscale restaurants that prefer fresh ingredients. The choice is yours.
Make sure to check out our other articles on microgreens as a survival food.